Sew My Style is a year long sewing challenge which gets you to try a new pattern each month. It is hosted by Jessica Lorraine and you can find the information here. It’s up to you whether you complete the monthly project and I’ve made more projects than I have skipped. On the whole the projects will work with a variety of body shapes. The September project is the Chalk and Notch Fringe Dress.
Pattern Description:
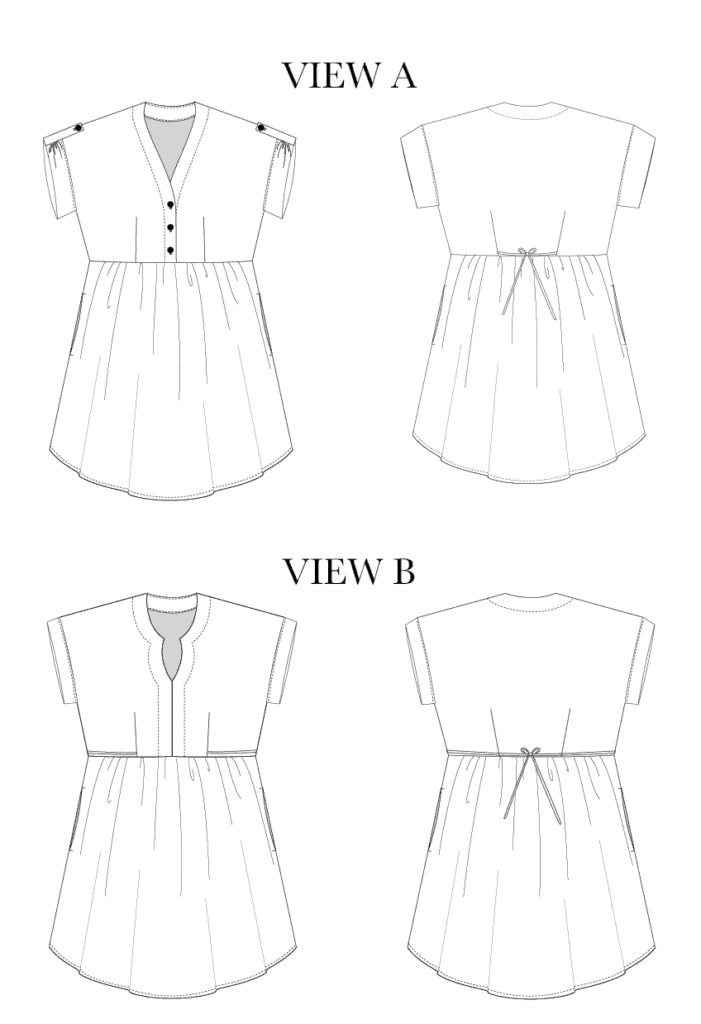
The Fringe Dress is pull on dress or top with grown on sleeves with a gathered skirt. There are two options for necklines, a button placket or a sculpted neckline.

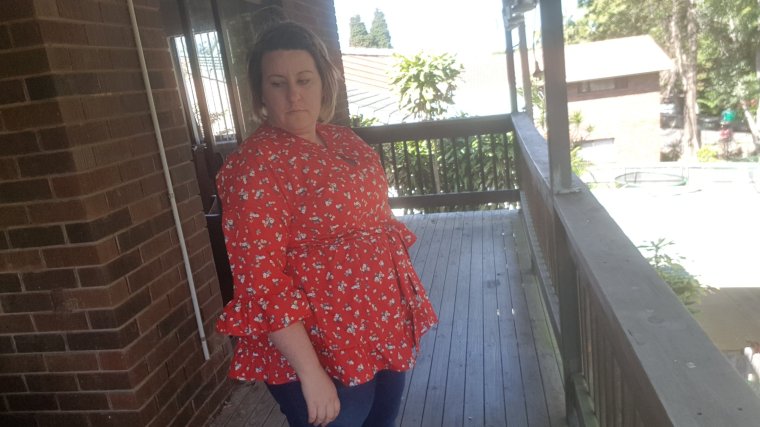
I’ve made the dress before and I haven’t work it much (mostly because I need to take it up a little). I thought I’d make a top version and knew I wanted to make one with a big waist tie and a few ruffles.
It was a really easy hack to achieve.
Pattern Sizing:
The pattern comes in Sizes 0 – 18

Fabric Used:
I’ve previously made it the Rifle Paper Co Cotton & Steel Fabric nearly everyone has used. This time I shopped my stash and came up with a red floral poplin I got from a destash group on Facebook.
I still have a decent size piece left over.

Did it look like the photo/drawing on the pattern envelope once you were done sewing with it?
Well once I finished hacking it there was still some semblance to the original pattern. If you stick to the original pattern pieces it is true to description.

Were the instructions easy to follow?
The instructions were clearly written and the drawings help make things even clearer. I followed the instructions and it came together pretty quickly – I had it sewn up in an afternoon.
I would suggest taking your time when putting the neck facing on.

Pattern alterations or any design changes you made:
For the sleeves I cut out the normal sleeve piece and the cuff. I extended the cuff piece by 2 inches. I inserted the sleeve piece without folding it in accordance with the instructions which meant the sleeve was twice as long and then gathered the cuff piece and attached it to the sleeve hem.
For the waist ties I cut 6 of the large tie piece. I joined two pieces together to form the two ties and the finished them in accordance with the instructions. Instead of inserting them into the back dart I added them to the waist seams to sit where my natural waist is.
The remaining two pieces were used to form the ruffle on the bottom of the skirt piece. Instead of cutting it with a curved hem I levelled it off.

What did you particularly like or dislike about the pattern?
To make the pattern fit I had to grade up a size which was pretty easy to do. This was mostly to accommodate my bust. I didn’t worry too much about the skirt piece as it was a top and the gathering gives plenty of room to move. I also didn’t need to add any extra room to the sleeve and I like how loose they sit.
I”m really happy with the fit and how comfortable it is to wear. The only thing I am not sure about is the ruffle on the bottom. I just can’t be bothered to change so it will stay for now.
It is designed as quite lose fitting by adding the ties it helped cinch it in a bit.

Other great versions can be found at?
Bettina reviewed the pattern for the Curvy Sewing Collective
http://curvysewingcollective.com/review-chalk-and-notchs-fringe-blouse-and-dress/
Meg at Cookin and Craftin
http://cookinandcraftin.blogspot.com/2017/08/testing-testing-chalk-and-notch-fringe.html
Chalk and Notch have just done a series on hacking the Fringe Dress
https://www.chalkandnotch.com/blog/
Conclusion:
I’m hoping to get a bit of wear out of it with the upcoming summer party season with jeans and a nice sandal or heel.

